


Overview
Activities such as phone calls, emails, and follow-up actions can be scheduled directly from the LeadFlow pipeline.
The system is flexible and customizable, allowing you to include detailed information when scheduling an activity. You may attach files, add links or media, insert tables, or format notes using bullet lists, numbered lists, or checklists.
This article explains how to schedule different types of activities for an opportunity and how to view and manage scheduled activities.
Tip: Click the images to enlarge the details.
Scheduling an Activity
Log in to your LinenFinder LeadFlow account and select the CRM screen from the left-side navigation menu.
Locate an opportunity in the pipeline. Click the clock icon next to the priority stars and select “Schedule an activity.”
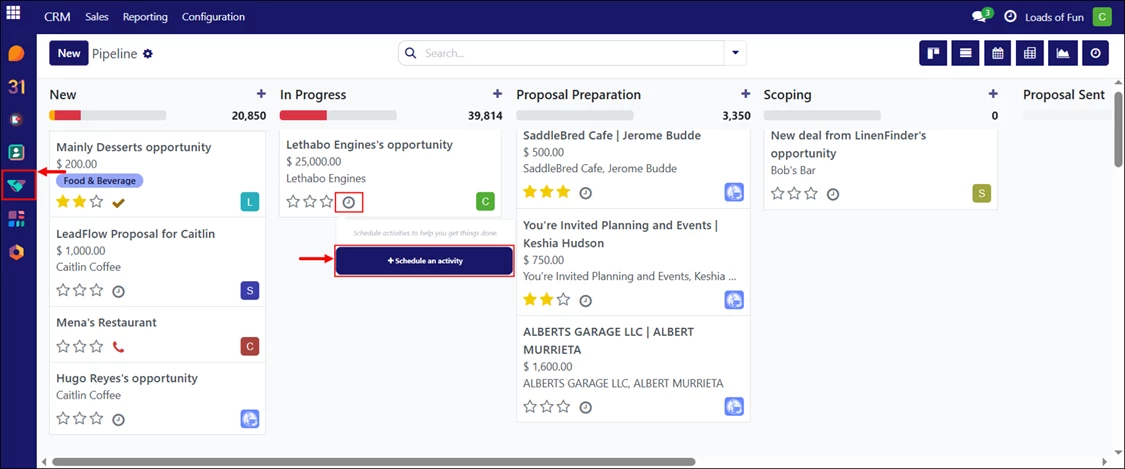
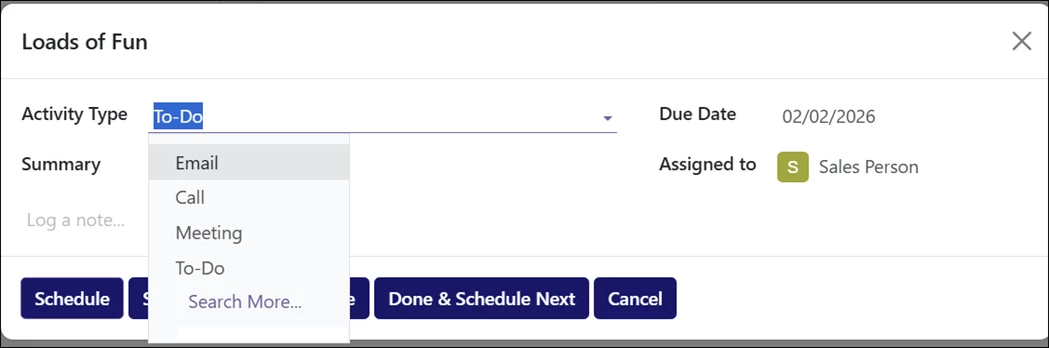
A pop-up window will appear, allowing you to choose the type of activity to schedule for the selected opportunity.
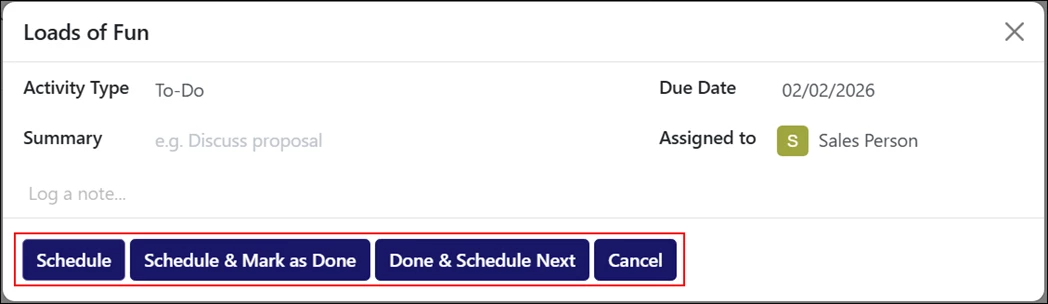
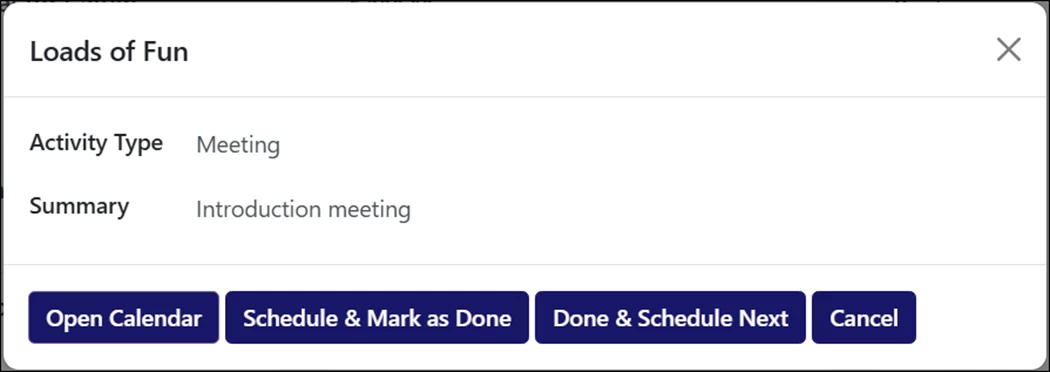
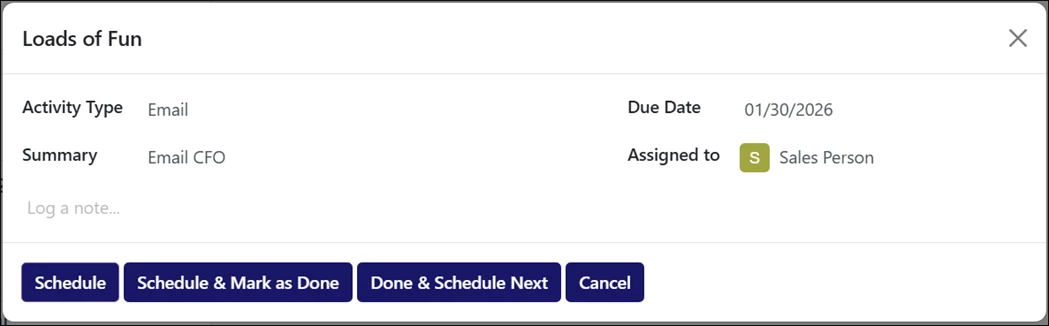
Activity Action Buttons
When scheduling an activity, the system displays a set of action buttons at the bottom of the window. The available buttons may vary depending on the selected activity type.
- Schedule – Saves the activity with the selected details and marks it as pending.
- Schedule & Mark as Done – Saves the activity and immediately marks it as completed. This is mostly used to ensure the system contains the most up-to-date information.
- Done & Schedule Next – Marks the current activity as completed and opens a new scheduling window for the next activity.
- Open Calendar – Opens the calendar view to select or adjust the activity date and time. This button is available only for activity types that support time scheduling.
- Cancel – Closes the scheduling window without saving any changes.
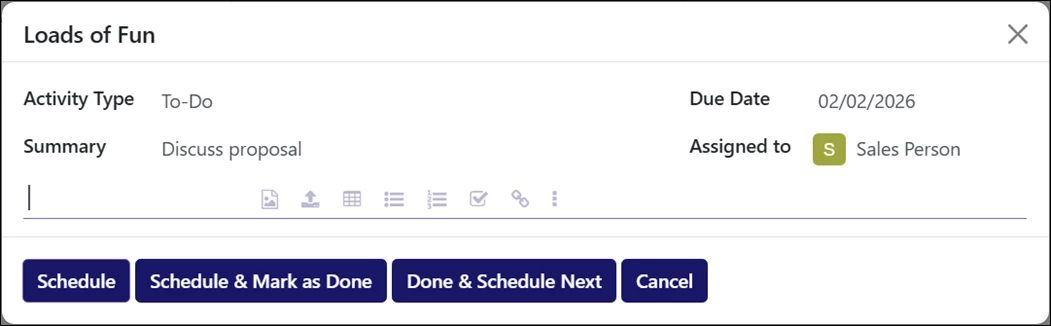
Scheduling an Action (To-Do)
- Select “To-Do” from the Activity Type dropdown menu.
- Select a due date.
- Enter a summary of the action. This summary can serve as the entire note if no additional details are required.
- Assign a user.
If needed, enter additional notes. Use the available icons to upload media or files, create bullet or numbered lists, add checklists, insert links, and more.
Example of a To-Do activity with a checklist:
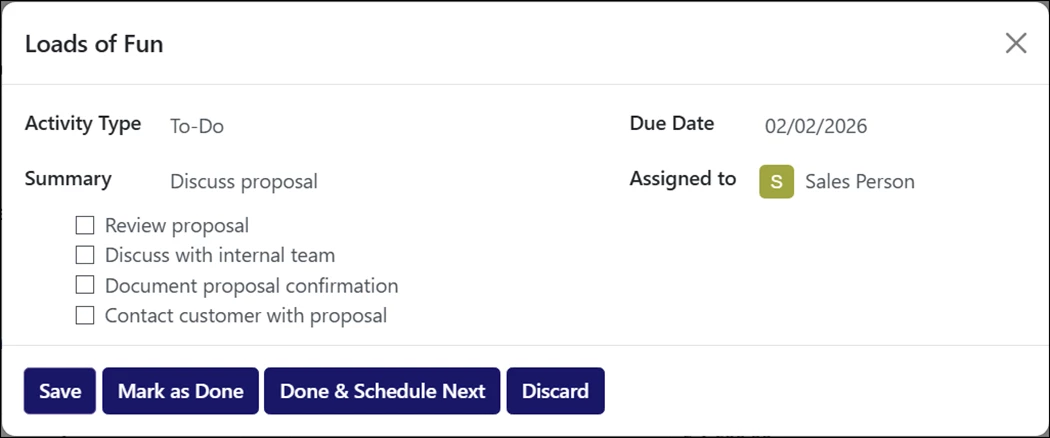
Once scheduled, the opportunity displays a checkmark icon to indicate a To-Do activity exists. Click this icon to edit, cancel, or mark the activity as done.
Scheduling a Call
- Select “Call” from the Activity Type dropdown menu.
- Select a due date.
- Enter a summary of the task. This summary can serve as the entire note if no additional details are required.
- Assign a user.
Enter additional notes if needed using the available formatting and attachment tools.
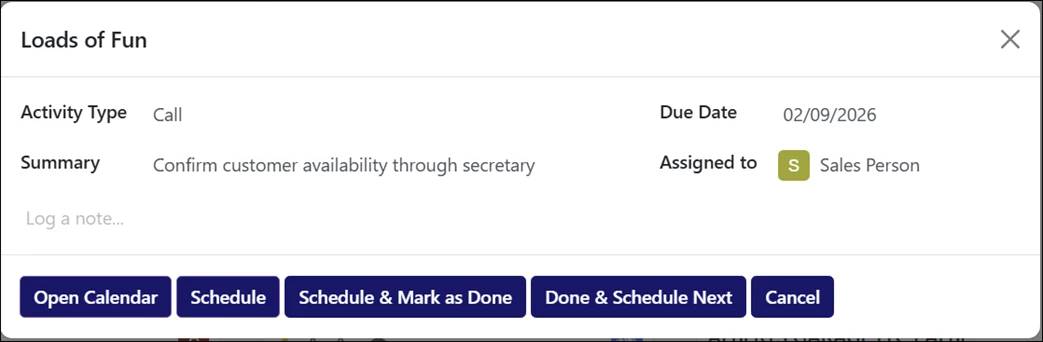
After scheduling, the opportunity displays a telephone icon to indicate a call activity is scheduled. Click this icon to edit, cancel, or mark the call as done.

Scheduling a Meeting
- Select “Meeting” from the Activity Type dropdown menu.
- Enter a meeting title in the Summary field.
- Click “Open Calendar” to select the meeting date and time.
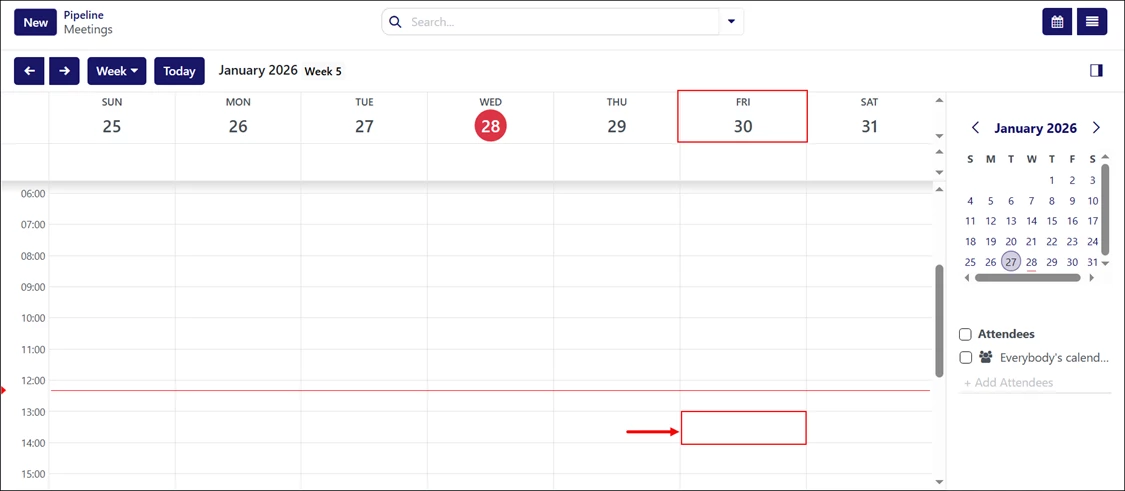
In the calendar view, locate the desired date and click the specific time row for the meeting. In this example, the meeting is scheduled for Friday, January 30th at 13:00 (1:00 pm).
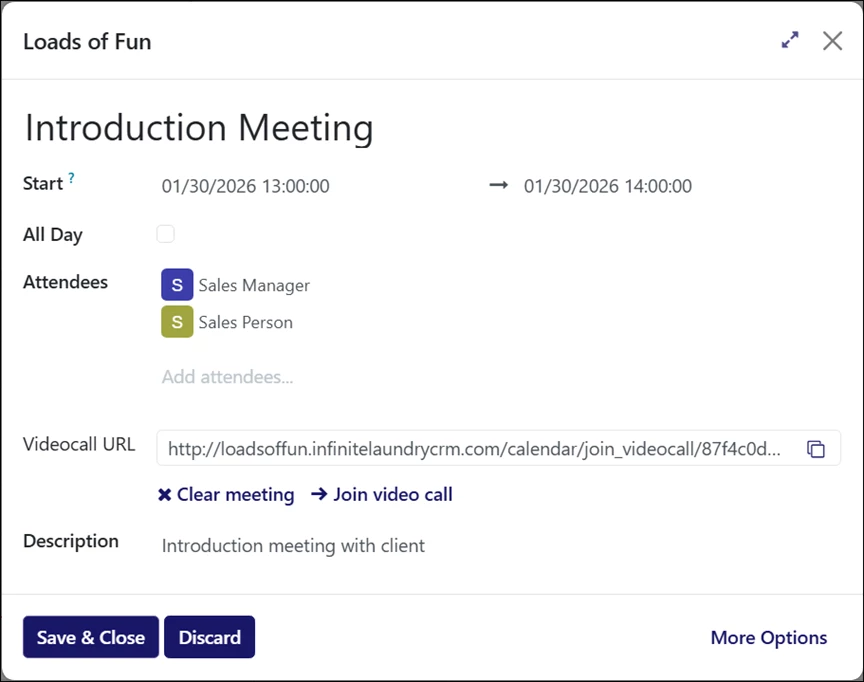
A pop-up window will appear where you can add additional details:
- Confirm or adjust the meeting start and end date and time.
- Add attendees.
- Enter the video call URL.
- Enter a description, if needed.
- Click Save & Close to finish.
Once scheduled, the opportunity displays a meeting icon (three-person silhouette) to indicate a meeting is scheduled. Click this icon to reschedule, cancel, or mark the meeting as done.

Scheduling an Email
- Select “Email” from the Activity Type dropdown menu.
- Select a due date.
- Enter a summary of the email. This summary can serve as the entire note if no additional details are required.
- Assign a user.
Enter additional notes if needed.
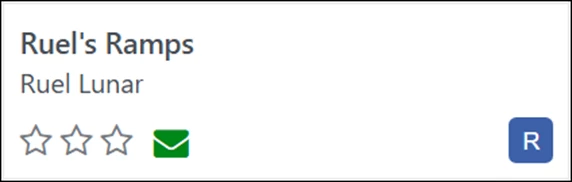
After scheduling, the opportunity displays an envelope icon to indicate an email activity is scheduled. Click the icon to edit, cancel, or mark the email as done.
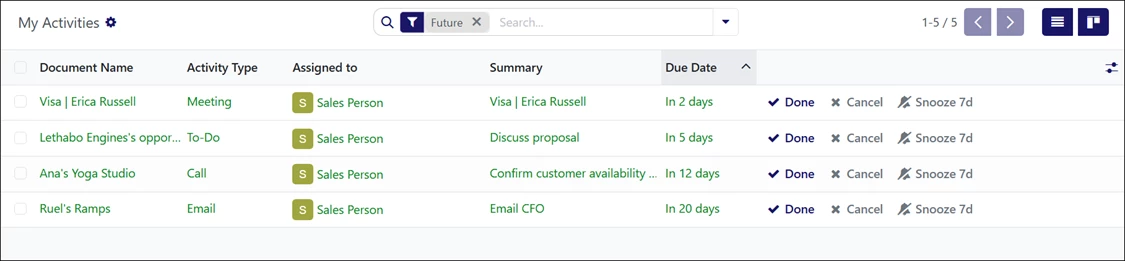
Viewing All Activities
In addition to viewing activities directly from individual opportunities, all scheduled activities can be accessed from anywhere on the LinenFinder LeadFlow site.
Click the clock icon at the top of the screen and select “View all activities.”
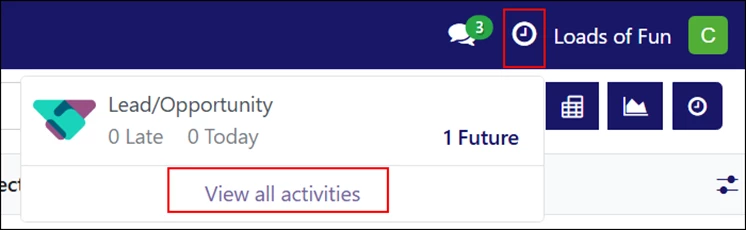
The Activities screen displays scheduled activities across all opportunities. Use the filters at the top of the screen to narrow the results. In this example, the screen is filtered to show future scheduled activities only.
From this screen, you can review activity details, cancel, or mark activities as completed.